Table of Contents
Now that REVEN-Axion is installed on your server, it is time to customize its configuration, and more importantly to setup your own virtual machines.
Please read the entire configuration guide carefully, almost each step is mandatory.
REVEN's options are located in two configurations files:
- The default build configuration which you should not edit,
- The user configuration, in which you can override defaults.
To setup new virtual machines, you will have to create and configure them in VirtualBox first, following the recommendations below. Then you must create a snapshot for each of them. Finally, you'll tell REVEN which virtual machine it can use.
Virtual machine setup
This section describes how to setup a virtual machine that will be suitable for scenario generation.
VirtualBox
The REVEN virtual machine provider is based on VirtualBox, you can check if it is available on the REVEN server by issuing the following command:
If no package is found, check your installation.
Virtual machine creation
Virtual machine creation within VirtualBox is well documented (see http://virtualbox.org/manual/ch01.html) and it's exactly the same as with REVEN VirtualBox.
Note that while REVEN will help you connect to existing VM later on when creating scenarios, VM creation works only on the server side: nothing is provided by REVEN-Axion to help users create new VM from a distant machine. The easiest way to do so would be to connect via SSH to the server and forward X11 via the command ssh -Y.
Note that by default, the reven user has been created without a valid password, you need to set one as root, before you can connect:
You can then connect:
Check the ssh man pages for further information.
Other ways exists to manage a remote virtualbox, but require extra packages like phpVirtualbox or remotebox.
Once a virtual machine is created, it needs a couple of modifications to be used for scenario generation.
IDE adapter
You must add an IDE adapter (or make sure it exists) called reven to the vm configuration with a CD-ROM as primary master device.
This can be done through the Storage section of virtual machine settings.

Snapshot
REVEN will restore the latest snapshot of the virtual machine when creating a scenario. This allows to keep a clean virtual machine state even after multiple scenario generations. Snapshots can be saved (whether the virtual machine is running or not) thought the Machine menu or with the default shortcut HostKey+T.
It is mandatory to create a snapshot. It is advised to do so when the virtual machine is in a convenient state (eg: unlocked desktop, etc.).
Guest OS necessary customisation
Optimisation
As REVEN will record the entire system execution, the user must disable any non essential system feature in order to reduce trace garbage and scenario size for faster analysis.
Some optimisation include:
- On Linux, disable Xorg server when not needed.
- On Linux, disable the console framebuffer if not needed (on Debian systems, add the line
GRUB_TERMINAL=consolein/etc/default/grub) - On Windows systems, disable desktop graphical effects.
- Disable any unwanted background service.
Reducing virtual machine RAM allows to reduce disk footprint, but this has no impact on analysis speed.
Autorun
To avoid the need to manually launch the program inside the virtual machine (through VNC), the user can setup the guest os to automatically start the loaders when a disk is inserted:
Windows has an CD-ROM autorun feature wich simply needs to be enabled.
On Gnu/Linux systems, users need to:
- add an entry into the
/etc/fstabfile - launch a
wait_cdrom.shscript wich will try to automatically run the loader once a cdrom is inserted. - create the virtual machine snapshot while the previous script is running.
The fstab entry could be:
The wait_cdrom.sh script could be:
Build configuration
The build.rc file (by default located in /usr/share/reven) stores the generic global configuration options of REVEN. The following options are available:
| Option | Description |
|---|---|
| reven_default_config_path | The path of the default configuration. |
| reven_user_config_path | The path of the user configuration. |
| projects_path | The path of the REVEN project data |
Warning: It is not recommended to modify the files in /usr/share/reven, as those files will be restored when REVEN is upgraded. Instead, you should override these options in your user configuration file (below).
User configuration
The user configuration file location (wich by default is /home/reven/reven.rc) is defined in the build configuration file described above. It is where you can customize and setup REVEN behavior. Options that are set in this file will override those located in the build configuration file.
You must edit your own user configuration file in order to setup virtual machines. Otherwise, you will not be able to generate scenarios. Sample settings are provided in the default configuration file (/usr/share/reven/default.rc) or below in the example chapter, so you can fecth the defaults and edit them:
Configuration file changes will only take effect in REVEN after having reloaded it with the following command:
The configuration options are split into multiple sections. Here is a detailed descriptions of each configurations fields:
Limit section
Within the [limits] section you can set memory usage limits for REVEN processes. It is not recommended to change these unless you know exactly what you are doing.
The folowing options are available:
| Option | Description |
|---|---|
| stack_limit | Maximum size of the stack for a REVEN process, in Mbytes |
| heap_limit | Maximum size of the heap for a REVEN process, in Mbytes |
VirtualBox section
Within the [vbox] section you can set wich virtual machines can be used for scenario generation.
Only one option is available:
| Options | Description |
|---|---|
| vms | A comma separated list of virtual machines names to register in REVEN |
Virtual machines section
Each Virtual machine options are registered within their own arbitrary section, they specify scenario generation options.
Example for a section with a vbox_name option set to vmdebian:

| Option | Description |
|---|---|
| os | The operating system type. Can be 'windows' or 'linux' |
| vbox_name | Optional. Name of the virtual machine on VirtualBox. If not set, the section name is used. |
| display | The name displayed in the Axion client |
| preloaders | Optional. A list of files deployed in the guest os, must includes loaders. See the example configuration below |
| dynamic_launch | Optional. The dynamic executable loader. See the example configuration below |
| static_launch | Optional. The static executable loader. See the example configuration below |
| stopper | Optional. The program used to kill the vm from the guest os. See the example configuration below |
| segment | The value of the userland code segement (cs) value |
| vnc_password | Optional. The password used by the VirtualBox vnc server. Default is randomly generated and displayed in the scenario generation ui |
| vnc_port | Optional. The port of the vnc server. In order to use multiple virtual machines at the same time, use different vnc ports. Default is 5900 |
| pdb_path | Optional. The path used for importing windows symbols file, see Symbols from PDB files . Default is none |
preloaders, dynamic_launch and static_launch options are needed for automatic scenario generation. If they are not specified, the user will have to generate the scenario manually with VirtualBox key bindings.
Changes to the pdb_path option will not be reflected on projects that have already been created. Check the project's input directory content if you need to change this option.
Example
This example describes two virtual machines, named vmdebian and vmwin8. Note that those virtual machines must have been previously created in VirtualBox, with those exact names.
Microsoft Windows symbols
Symbols from PDB files
REVEN can leverage Windows debugging symbols available as pdb files to enhance the execution trace readability. These files must be placed in the directory specified in the variable pdb_path (Virtual machines section ).
Retrieving PDB
A PDB file associated to a binary can be downloaded from a Microsoft Symbol Server by using symchk.exe.
Exemple: To retrieve all PDB files for every binary in "C:\\Windows\\system32" use the following command:
Warning
- We currently support PDB format v7.0. Most of PDB files are in that format except some for Windows XP and older).
- We now match PDB files to their corresponding binaries using the latter's GUID. Be sure to get the right PDB file otherwise it will not be loaded.
Advice
PBD parsing, if you have thousands of them, can significantly slow down reven instances startup time. You can either try to create subdirectories per OS to reduce the number of files to load, or/and place the pdb directory on an SSD disk.
Windows API documentation
REVEN can also use an API documentation xml file in order to provide advanced information such as parameter types, names and calling convention. This xml file can be generated by extracting and parsing the MS Windows help files:
Extracting HxS help files (shipped with Visual Studio SDK 2005 and 2008)
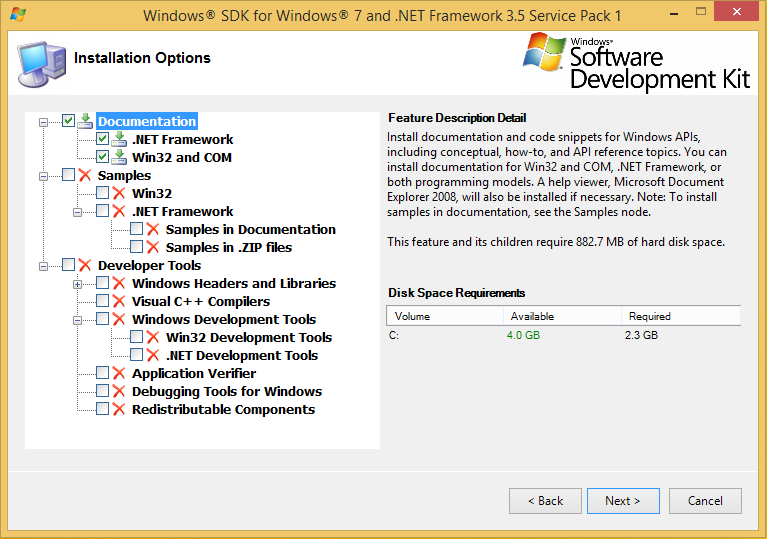
In order to have a local copy of the MSDN documentation, download the Visual Studio SDK installer from the Microsoft website (tested with the SDK for Windows 7 and .NET 3.5 SP1) and install the documentation packages.
Now you need to extract the HxS files, which can be done with an archive extractor like 7zip:
On MS Windows, to extract the HxS files located in C:\Program Files\Microsoft SDKs\Windows\v7.0\Help\1033 (the default installation path) to the C:\extracted_hxs_files directory, execute the following command:
Alternatively, on a Linux system, to extract the HxS files located in ~/hxs_files into ~/extracted_hxs_files, execute the following commmand:
Generating the REVEN msdn.xml file
Once the HxS files have been extracted, the final xml file can be generated with the msdn-crawler.py script shipped with REVEN (located in /usr/share/reven/scripts/)
On MS Windows (supposing you copied the crawler script from an Axion installation)
On Linux
Finally, copy the generated msdn.xml into the pdb_path directory (see the virtual machine setup).
Multiple user setup
REVEN is designed to be used by multiple users simultaneously. By default, REVEN's installation creates a unique user named reven.
Managing the available users is done directly on the server system by adding or removing subdirectories in the REVEN project data folder specified in the build.rc file.
For example, adding a new user named foo with a project data folder setted to /home/reven/reven_data can be done through the following commands: