VirtualBox Virtual Machines
The REVEN server makes use of VirtualBox virtual machines to record the execution of the scenarios you want to analyze. This section describes how to setup a virtual machine that will be suitable for scenario recording.
Pre-requisites
IMPORTANT: VirtualBox is installed during the REVEN server installation process.
IMPORTANT: Should you need some advanced system configuration, such as
dedicating a USB device to a VM, you will have to manually add the Linux
user running REVEN to the Linux group vboxusers. If reven_user is the user
login, this can be done using the command line sudo adduser reven_user vboxusers.
NOTE: Managing remotely a VirtualBox machine may be done through a SSH connection with X-Forwarding enabled or with solutions such as phpVirtualbox or remotebox. We will not document them here.
NOTE: VirtualBox VMs are currently only supported for Intel processors, and not for AMD processors.
Creating VirtualBox VMs for scenario recording
- Create a virtual machine in VirtualBox. Please refer to VirtualBox's online documentation.
- Add an IDE adapter to the VM configuration (or make sure it exists). This can be done through the Storage section of the virtual machine settings:
- Set the IDE adapter name to
reven. - Set it as CD-ROM / primary master device.

- Setup the
Systemsettings as follows: - In the
Processortab, set the number of processors to 1.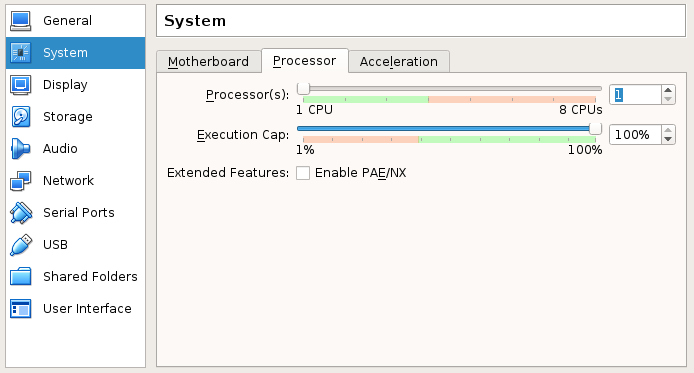
- In the
Accelerationtab:- Set the
Paravirtualization interfaceto None. - Check all boxes of
Hardware Virtualization.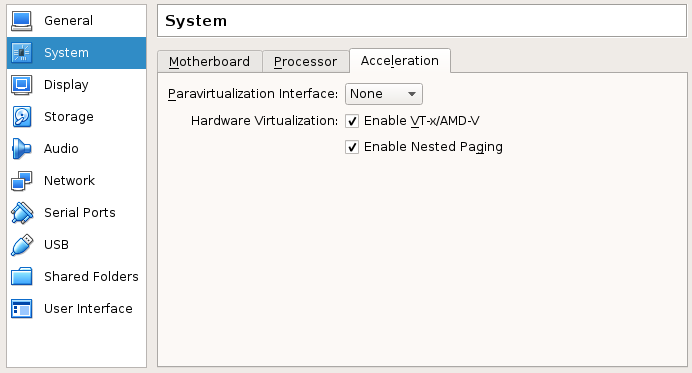
- Set the
- Setup the
Audiosettings either disabled, or enabled with the ICH AC97 audio controler selected. Otherwise, the Virtual Machine may not start. - Install the Microsoft Windows or Linux guest OS of your choice on the virtual machine.
WARNING: Make sure to remove any software that may communicate with
the VirtualBox hypervisor from the guest. Intrusive software such as
VirtualBox's Guest additions (which provides extended features like drag
and drop, clipboard sharing and full resolution display) may lead to unhandled
hypervisor behavior, and the recorded scenario will not be properly handled
by REVEN.
VirtualBox snapshots
For a given VM, the Project Manager will show you a single list of VirtualBox snapshots to record scenarios from.
Disk snapshots
This is the equivalent of taking a snapshot while the VM is shut down, or discarding its saved state when taking a snapshot on a running VM.
Live snapshots
This is the saved state you get when you shut the VM down choosing Save state, or when you take a snapshot on a running VM.
Typical VirtualBox usage
We recommend the following approach to prepare a VirtualBox snapshot that will be used for a scenario recording.
In the VirtualBox GUI:
- Create and setup the VirtualBox VM.
- Install software & configuration required by your scenario in the VM.
- Run operations required in the VM before the scenario recording but that need not be recorded.
- Take a snapshot of the VM.
- Shutdown the VM.
In the REVEN Project Manager:
- If the VM has previously been registered, simply refresh the list of snapshots for the VM.
- If the VM has not been registered yet, simply register it. Its snapshots will be automatically known by the Project Manager.